Vegan Chocolate Haupia Pie
Servings: 8 slices
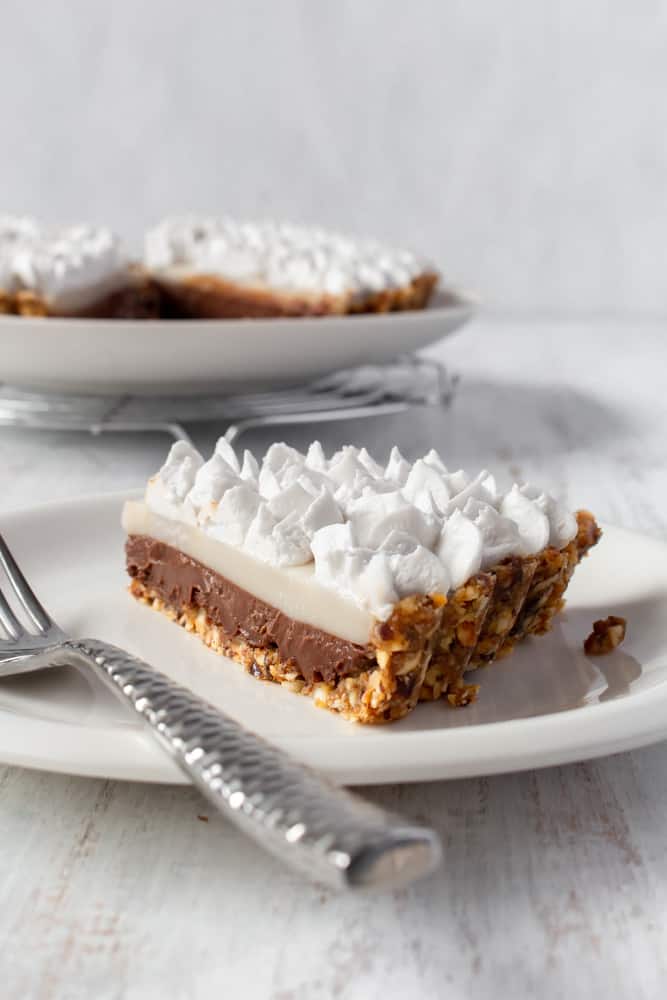
Vegan chocolate haupia pie is a plant-based version of the classic Hawaiian dessert by Ted’s Bakery! Gluten-free, creamy, silky, and no-bake, it’s the perfect make ahead dessert for a summer BBQ!
Print
Pin
Ingredients
Crust
- ⅔ cup / 100g cashews
- ⅔ cup / 100g almonds
- ⅔ cup / 100g fresh dates
- ½ teaspoon fine sea salt (omit if you are using salted nuts)
Chocolate Haupia Filling
- 1 can / 400g Chef's Choice coconut milk
- ½ cup / 120ml non-dairy milk (use extra coconut milk for a stronger coconut flavor!)
- 1 cup / 200g sugar (for a classic white haupia, use white sugar)
- 1 cup / 240ml water
- ½ cup / 56g cornstarch
- 6 oz / 170g chocolate, chopped (use good quality chocolate - I prefer 50-55% cacao)
- 1 can / 400ml Nature's Charm coconut whipping cream, refrigerated overnight
Instructions
Crust
- In a food processor, add the cashews, almonds, fresh dates, and fine sea salt. Process until it forms a fine and sticky crumble. Press it into a 9-inch tart or pie pan and stick it in the fridge to chill.
Chocolate Haupia Filling
- In a small saucepan, add coconut milk, non-dairy milk, sugar, and heat on medium heat. While it's heating, combine the water and cornstarch in a bowl until the cornstarch is dissolved. Once the coconut milk mixture reaches a boil, add the cornstarch mixture to the pot. Reduce the heat to low and continue to heat for 3 minutes while constantly whisking.
- In a bowl, add the chopped chocolate and pour half of the hot haupia mixture on top. Set it aside for a couple of minutes to let the chocolate melt before stirring. Once the mixture is smooth, pour it into the chilled crust. Smooth the top with an offset spatula and put it in the fridge to chill for 10-15 minutes.
- Take the pie out of the fridge and pour the rest of the haupia mixture on top. Smooth the surface and put back in the fridge for at least an hour. Whip a chilled can of Nature's Charm coconut whipping cream using a hand mixer and top the pie. Put it back in the fridge until ready to serve.
Love this recipe?Snap a photo and share tagging @aimadeitforyou or tag #aimadeitforyou!